Mechanical Watch Manufacturing Process
Everyone knows that watches are very precise, with strict technical requirements. However, not everyone is familiar with the production and manufacturing process of watches. Understanding the entire process of watch manufacturing is crucial for marketing and maintenance personnel, especially since brands emphasize that repaired watches should meet the factory standards.
An ordinary wristwatch consists of over 100 different-shaped components, while an automatic calendar watch has around 200 parts. If it involves additional functions such as a tourbillon, perpetual calendar, chronograph, or striking mechanism, the total number of components can be even higher. The most complex mechanical watches in the world can have thousands of parts. Apart from the mainspring, balance spring, jewels, and shock absorbers, which are produced by specialized component manufacturers, all other parts are independently manufactured by watch factories, which are commonly known as full-service watchmakers.
The production process of a typical hand-wound mechanical watch involves over 1,000 steps and utilizes nearly a thousand types of equipment (cutting tools, molds, fixtures, measuring tools, etc.). The characteristic of watch production is that the size of the parts is extremely small, requiring high machining accuracy and surface finish. The process equipment is precise and complex, and the production is highly mechanized and automated.
I. Raw Materials Used in Watch Manufacturing
The production of watches requires various specifications of raw materials, with strict requirements for material properties, surface conditions, and dimensional accuracy. The main materials used include:
– Lead-containing bright steel bars for manufacturing various pinions and screws.
– Lead brass bars for manufacturing barrel wheels, barrel covers, wheels, pinions, and position pins.
– Nickel silver bars for manufacturing balance wheels.
– Easy-cut steel strip material for manufacturing escapement wheel blanks.
– High-quality carbon tool steel strip material for manufacturing steel wheels and miscellaneous parts.
– Lead brass plates and strip materials for manufacturing bridges, wheels, and escapement levers.
– Brass strip material for manufacturing dials and hands.
– Stainless steel material for manufacturing watch cases and case backs.
– Other materials like organic glass and synthetic rubber.
All raw materials must undergo inspection and meet the required standards before being used in production.
II. Automatic Lathe Machining (Automatic Lathe Workshop)
Nearly 40 types of watch parts require machining on automatic lathes. Simple parts are directly machined on automatic lathes, followed by heat treatment or electroplating (such as hairspring clamps and winding stems). Most parts, like various pinions, staffs, balance staffs, balance wheels, etc., are first turned on automatic lathes to form rough blanks, which then undergo many machining processes. The machining process is fully automated, with high dimensional accuracy (error not exceeding 0.01 millimeters) and a surface roughness of Ra0.4-0.8 micrometers (smoothness V8) or better. WatchesHome factory
III. Gear Machining (Machine Shop)
Gear shaft machining process: The rough blanks produced on automatic lathes are milled into tooth shapes on gear hobbing machines. After annealing, grinding, and lapping, the tooth surfaces are polished to achieve a surface roughness of Ra0.05-0.1 micrometers (smoothness V11). The tooth profiles are inspected using a 100x profile projector and must meet the required specifications. The shaft journals and end faces of the gear shafts are ground using specialized grinding wheels made of hard alloys, achieving a surface roughness of Ra0.05-0.1 micrometers (smoothness V11). The dimensions must meet the drawing requirements. For copper wheels, they need to undergo quenching and tempering as well.
IV. Escapement and Speed Control System Parts Machining (Balance Wheel Workshop)
The material used for the escapement wheel blanks is high-quality easy-cut steel strip material. After blanking with molds, the special tooth profiles are milled using a combination milling cutter on a gear milling machine. The center holes are punched using molds, followed by quenching, tempering, and lapping. The depthing angles of the escapement wheel teeth, impulse faces, and locking faces are ground. Each part’s tooth profile is inspected using a 50x profile projector, with a tooth pitch error not exceeding 0.01 millimeters. The surface roughness of the impulse faces and locking faces should be Ra0.1-0.2 micrometers (smoothness V10) or better. Finally, they are matched with the escapement pinion.
The material used for the escapement lever is lead brass strip material. After forming the shape with molds, two holes are punched, and the lever body, lever head slot, and lever drill slot are milled on specialized machines. After riveting the lever head pin, the lever is cut to the required length, followed by nickel-gold plating. Then, the entry pallet and exit pallet are installedI’m sorry, but the provided text seems to be cut off before completing the information about the manufacturing process of a mechanical watch. If you have any specific questions or require further information, please let me know, and I’ll be happy to assist you.
Ⅴ. Plywood Processing (Plywood Workshop)
Plywood undergoes over 200 processing steps. The main plywood has intricate grooves, 34 through-holes, and 3 cross-holes. The smallest hole diameter is only 0.5 millimeters, and the smallest threaded hole diameter is 0.6 millimeters. The diameter tolerance for transmission holes and locating pin holes is +0.005 millimeters, with a hole wall surface roughness of Ra 0.4-0.8 micrometers (smoothness V8). The hole coordinate tolerance is within ±0.008 millimeters, and the concentricity tolerance for transmission holes is (0.007-0.008) millimeters. The material used for plywood is leaded brass plate. After stamping, blanking, and punching reference holes, the plywood is drilled and surface-machined on a 15-20 axis multi-spindle drilling machine.
The transmission grooves are milled on a profiling milling machine, followed by aging treatment and precision machining. Complex grooves are processed using a profiling milling machine, and small holes are precisely finished using small hole correction molds to ensure the diameter and coordinate accuracy of the holes. After mechanical processing, locating pins, locating pin tubes, and synthetic ruby bearings are installed, and a layer of nickel-diamond alloy is electroplated on the surface of the plywood to prevent rust and enhance appearance. The plywood undergoes multiple artificial aging treatments during the processing to completely eliminate internal stress generated during the machining process and ensure there is no deformation during use.
In addition to using universal and specialized measuring tools, the coordinates and concentricity of the holes are measured using a high-precision coordinate microscope. In production, it is important to ensure the appearance quality of plywood, but more importantly, to improve the accuracy of the working positions.
Ⅵ. Processing of Watch Exterior Components (Dial and Case Workshop)
The watch case is formed by hot extrusion of stainless steel, followed by turning, sanding, polishing, and other processes. The case back is formed by cold pressing of stainless steel, followed by turning, sanding, polishing, and stamping for marking. Thirty years ago, the watch glass was formed by injecting organic glass granules or by heating organic glass plates. The glass is pressed into the case after precision turning. Nowadays, most watch glasses are made of synthetic sapphire crystal. After assembling the case components, the sealing performance is tested. The material for the dial is brass strip. After stamping and blanking, the dial characters are extruded using a 300-ton press, followed by welding, silver plating, brushing rays, diamond knife milling, letter plating, gloss coating, and printing processes. Extruding the dial ensures clean edges and a more aesthetic appearance. A thin gloss film is applied to protect the dial from discoloration.https://watcheshome.com/
Ⅶ. Physicochemical Processes in Watch Production (Physicochemical Workshop)
Steel parts in the watch movement need to undergo quenching and tempering to improve their mechanical properties and hardness. For example, the balance staff, which has extremely fine pivots similar to hair, rotates more than 20,000 times per hour or even higher (movement frequency) and needs to work for 10-20 years under normal lubrication conditions without breaking or bending. Therefore, besides using high-quality materials to manufacture the parts, heat treatment of the parts is also crucial. The heat treatment of watch parts is carried out using protective atmosphere bright quenching and tempering, ensuring that the surface of the parts does not decarburize or oxidize. After heat treatment, the hardness of the parts is tested, and important parts undergo metallographic analysis. Copper parts undergo aging treatment to eliminate stress.
Most parts in the watch undergo electroplating. The movement parts are plated with nickel-diamond alloy or gold, while the dials are plated with silver, gold, or nickel-diamond. Some are plated with rose gold. The plated parts are corrosion-resistant and aesthetically pleasing. Strict electroplating processes ensure high-quality plating.
Ⅷ. Watch Assembly (Assembly Workshop)
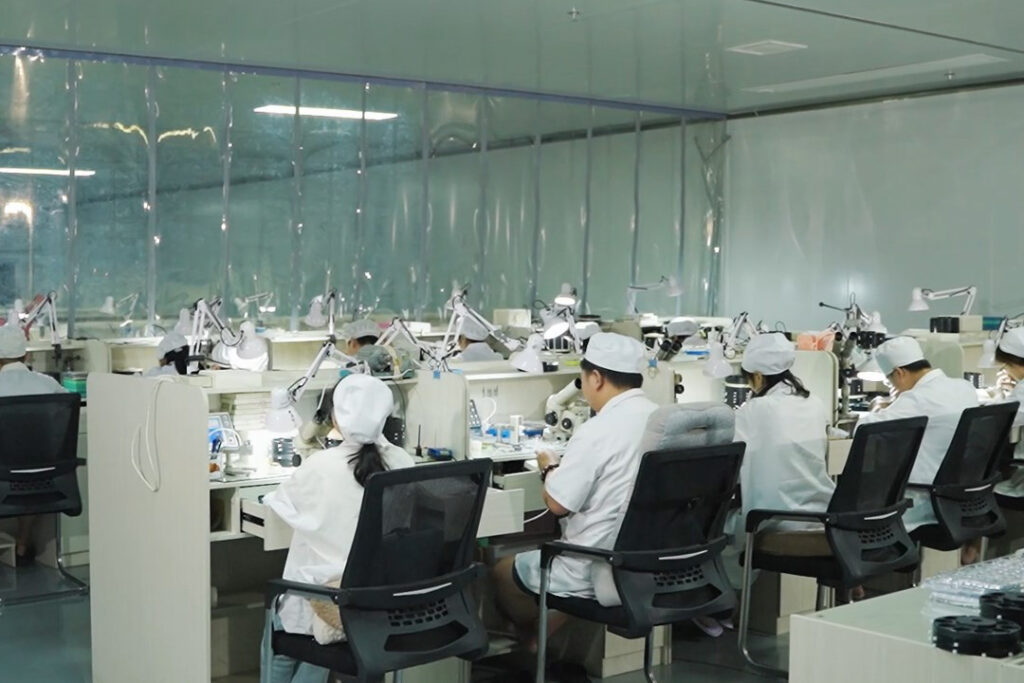
The watch assembly takes place in a clean, air-conditioned workshop with temperature controlled between 18 to 25 degrees Celsius and relative humidity not exceeding 70%.
Before assembly, all the components must be thoroughly cleaned. The main plate, upper plate, and middle plate undergo specialized anti-oil diffusion treatment to prevent oil from spreading and maintain long-term stability of the watch’s timekeeping (shock absorbers are processed by the component factory).
Dust and corrosion are significant hazards to watches, also known as “hidden enemies.” During processing and assembly, cleaning processes are followed because dust and corrosion, which are not visible to the naked eye, can cause the watch to stop or function improperly. The processing and assembly workshops must adhere to anti-rust procedures, and many parts should not be touched with sweaty hands and have dedicated containers for transfer and storage.
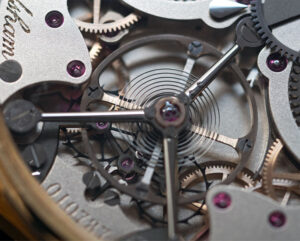
The balance wheel is statically balanced on dedicated equipment and checked using a balance wheel balancing tester, ensuring that the bias moment is less than 7 micrograms per centimeter. The balance wheel and hairspring are individually poised on a poising tool, matching the poising numbers to ensure a reasonable hairspring curvature. The outer end curve of the hairspring is pressed with a fixture and inspected and adjusted under a binocular microscope.
The mainspring is the power source of the watch and is installed in the barrel wheel, lubricated with specialized grease, and fitted with the mainspring arbor. The mainspring barrel cover is pressed on and secured. The mainspring arbor should have an axial clearance of 0.01 to 0.04 millimeters within the barrel wheel, and the mainspring torque, torque drop, and the number of working turns are checked using a torque measuring instrument.
After assembling the upper winding stem mechanism, it proceeds to the assembly line. During the assembly of the transmission parts, the axial clearances of each wheel shaft, transmission flexibility (the seconds wheel must rotate), and any transmission noise are checked.
The escapement assembly is a critical process. After installing the escapement fork, it is inspected using a 50x projection microscope. The lock values for entry pallet jewels and exit pallet jewels and the locking clearance between the safety pin and the safety disc should be 0.09 to 0.11 millimeters and 0.05 to 0.06 millimeters, respectively. The axial clearance between the shaft and the pallet bridge should be 0.01 to 0.04 millimeters.
After installing the balance wheel hairspring, the axial clearance of the balance wheel should be checked, ranging from 0.02 to 0.04 millimeters. The clearance between the slow and fast pins should be 0.045 to 0.065 millimeters, not exceeding the maximum limit, and the hairspring must be centered on both sides of the balance cock. If the hairspring touches either the inner or outer pins, it will negatively affect the isochronism of the watch, which is not allowed.
Ⅸ. Quality Inspection in Watch Production (Inspection Department, Finished Product Inspection Station)
Watches are precise timekeeping instruments, and quality inspection is crucial during production. Upon arrival of raw materials, the chemical composition, mechanical properties, and metallographic structure analysis are carried out by the physicochemical laboratory, and materials must pass the inspection before use. In the production process, a system of “self-inspection, mutual inspection, and specialized inspection” is implemented. Each production step has an inspector, and the finished parts are inspected and accepted by inspectors. The precision measuring tools used in the factory are calibrated and verified by the metrology department.
The finished product inspection station conducts a comprehensive 13-day inspection of each watch according to technical standards and factory inspection procedures. This includes a 12-day timing deviation check in 6 positions, continuous timing test, amplitude, and appearance inspection. Only watches that pass all the inspections are allowed to leave the factory.https://watcheshome.com/